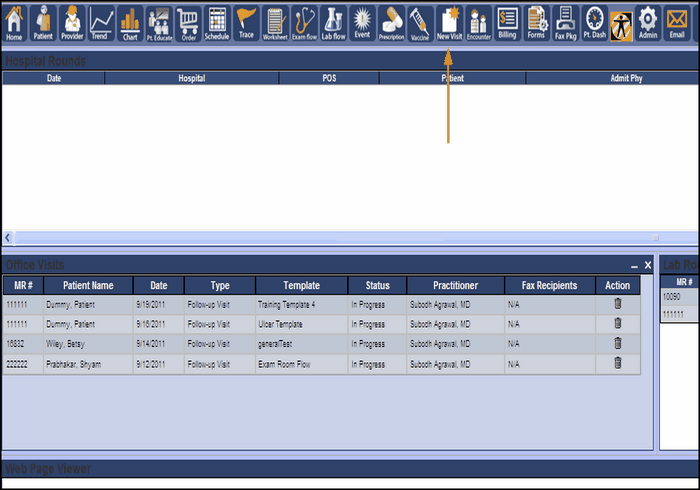
Now that the research is done and the template outline is finished, we need to create a visit. The purpose of creating a visit is to assign the template to a patient so the template structure can be built.
|
From the Dashboard, select the New Visit button |

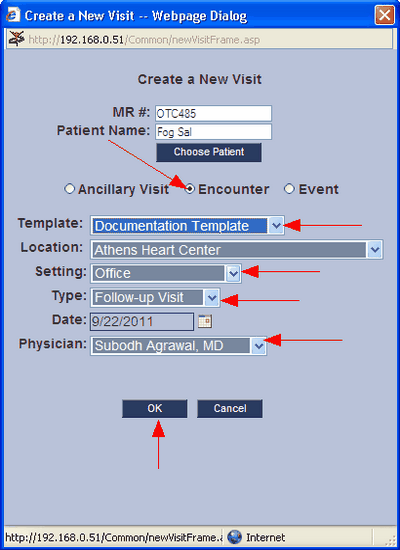
This brings up the Create Visit dialogue box. We will enter all of the relevant information into this box:
|
1. Choose a patient 2. Choose the visit type 3. Select the correct template 4. Confirm the remaining settings |
First, we need to select a Patient by clicking ![]() , this brings us to the Patient Chooser screen. This screen allows us to search the patient
, this brings us to the Patient Chooser screen. This screen allows us to search the patient
database using several different criteria. We can search by medical record number (MR), first or last name, date of birth (DOB), or Social Security Number (SSN).
Once a criteria is entered, the system begins to fill the patient list with matching patients. When the patient we are looking for is found we can highlight this
patient by clicking on the patient in patient list. Type "Fake" into the First Name box of the Patient Chooser screen. In the patient list box, highlight the patient by clicking Sal, Fog.
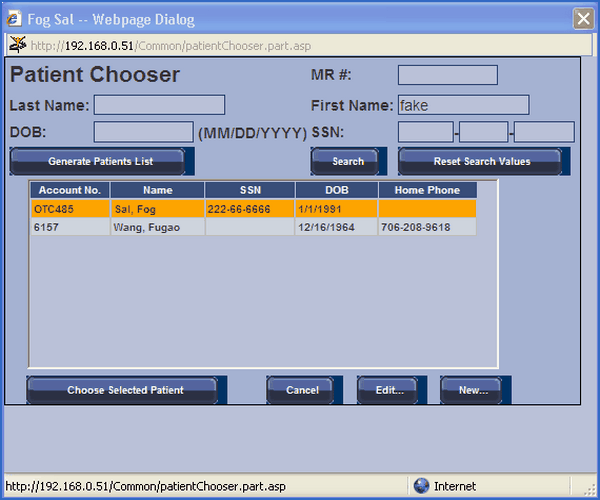
Click ![]() to select the highlighted patient into the Create Visit screen. This action will take us back to the
to select the highlighted patient into the Create Visit screen. This action will take us back to the
Create a Visit screen, but now the patient information is ready.
Below are the final steps in creating the visit that assigns the patient to the template. Now the patient information is entered correctly, we need to select the other appropriate information.
|
Select the visit type, in this case select Encounter.
Choose the correct template. This is done once the visit is chosen. Remember in the creation of a template structure we assign a visit type to the template. This is where that piece of information comes in handy. Once we select Encounter, only a few templates can be selected.
Now just fill in the rest of the information, office location, setting, type, date, and the Physician.
Make sure your Create a New Visit box is like the one above, the red arrows indicate all of the important information.
Now that we have all the information needed, click OK. We are now ready to begin building the actual template tree content. |