This section describes using HPN Chart in the Clinic Workflow as described in the Tracker Board. This workflow tracks the patient from the time the patient is assigned a room until the patient has entered check out.
The workflow steps as defined by the Tracker Board are:
| 1. | Workup in Progress |
| 2. | Patient Ready |
| 3. | Encounter in Progress |
| 4. | Patient is waiting for Test or Lab |
| 5. | Patient clinical visit is complete (No patient in room) |
Workup in Progress
This process starts when the patient is called from the waiting room to start the appointment. Prior to starting this process, the patient has been checked-in as available for the appointment and is in the waiting room. The Workup process starts with the room assignment. The room assignment can be made using a Kiosk or Appointment Scheduling Check-in dialog screen.
Patient check in using the Kiosk
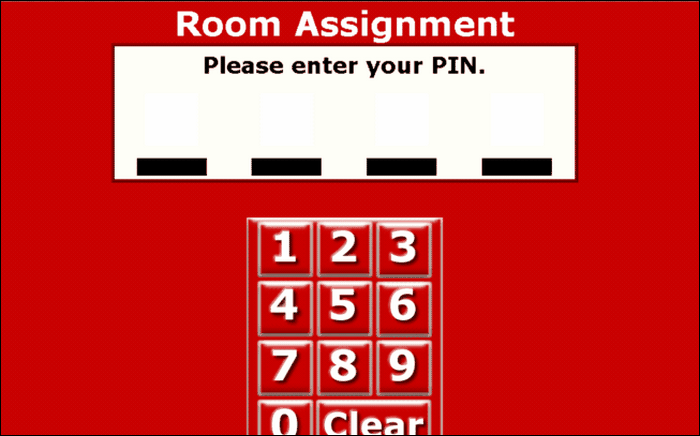
The Kiosk is located at the clinic entry door. The screen is ready for use when the display state is as shown in Kiosk Clinic Workflow Figure 1. Before the patient is called to start the appointment the room assignment is made. The personal identification number (PIN) is entered in the Kiosk.
| 1. | The Select the Schedule screen appears Kiosk Clinic Workflow Figure 2. |
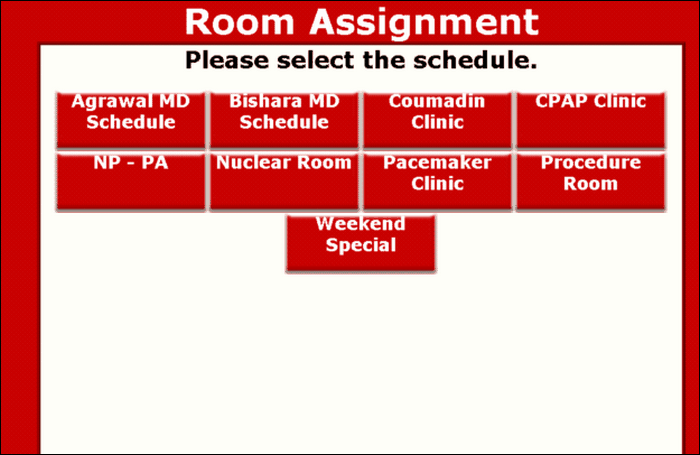
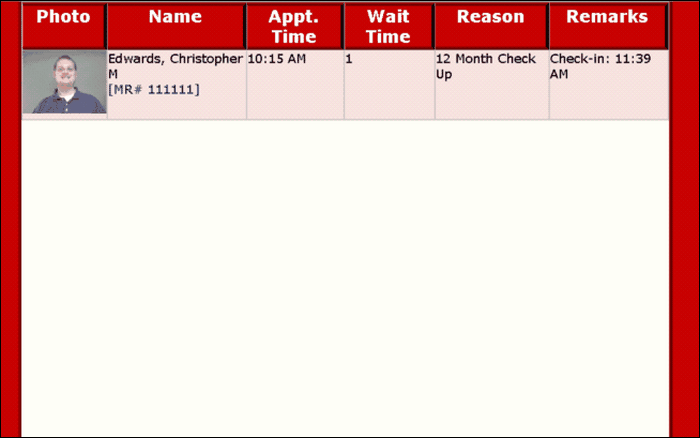
| 2. | This screen displays the schedules that are also shown in Appointment Schedule. To find the patient, the schedule must be selected. When the schedule is selected a list of patients waiting will be displayed as shown in Kiosk Clinic Workflow Figure 3 |
| 3. | Select the patient from the list. The Select Room screen will appear as shown in Kiosk Clinic Workflow Figure 4. |
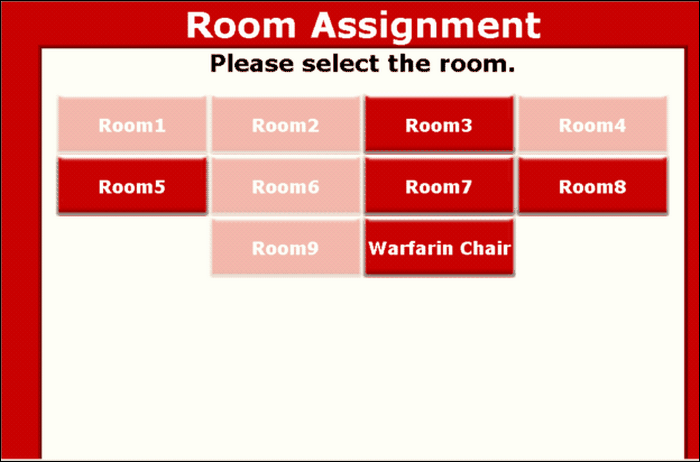
| 5. | The Room Assignment Screen will display available in red. Rooms currently in use are displayed in pink. Click on an available room. The Room Assignment confirmation screen will appear as shown in Kiosk Clinic Workflow Figure 5. |

| 6. | Call the patient and take the patient to the assigned room. |
Patient Check In using Appointment Scheduling Check-in Dialog Screen
This process can be started from any personal computer screen. Before the patient is called from the waiting room click on Scheduling ICON as shown in Appointment Scheduling Clinic Workflow Figure 4.
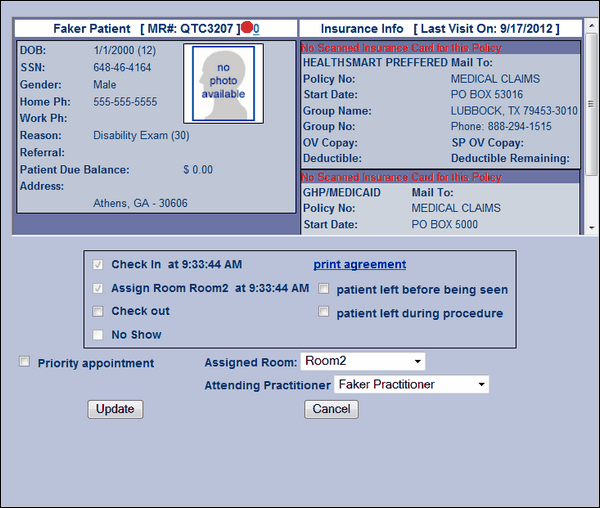
| 1. | Double Click the patient’s name from the time slot of the schedule. The Track Appointment Dialog will appear as in Track Appointment Clinic Workflow Figure 5. |
| 2. | Complete the data entry in the Track Appointment Dialog by clicking the Check In check box found in the middle of the screen. Then select a room from the drop down box menu box at the right of the screen and double check the attending practitioner is correct. If not select it from the drop down menu. |
Patient is in Room for Workup
| 1. | When the practitioner signs into HPN Chart from the room where the patient has been assigned and located and double clicks on Worksheet ICON Button, the proper worksheet for the patient will be displayed. See Patient’s Worksheet Clinic Workflow Figure 6 See a description of the use of the Worksheet in the Encounter Chapter. |
![]()
When the Workup is complete, the practitioner clicks the tracker board display Patient’s Work Sheet Figure Clinic Workflow Figure 6 on the worksheet to indicate the Workup is complete and waiting for the Physician (Patient’s Worksheet Button 2)
Patient in Room and Waiting
| 1. | When physician arrives in the room with the patient, the physician will click the tracker board display to indicate the Encounter is in Progress. (Patient’s worksheet button 3) If the Worksheet for the patient is not ready for display when the physician arrives in the room, then the physician will select the Worksheet ICON Button and the Worksheet for the patient will be re-displayed. |
Encounter in Progress
| 1. | The physician completes the examination and records the exam data in the worksheet. When the exam is complete the physician can: |
| a. | Dismiss the patient from the room (Exam is complete) to Check Out or |
| i. | The physician will click the tracker board display (Patient’s Worksheet Button 5) to indicate the room is empty. |
| b. | Dismiss the patient to waiting room for another appointment for the same day or |
| i. | The physician will click the tracker board display (Patient’s Worksheet Button 5) to indicate the room is empty. |
| c. | Hold the patient in the room for LAB work (blood to be drawn, etc) or |
| i. | The physician will click the tracker board display test pending button (Patient’s Work Sheet Button 4) to indicate the patient is in the room waiting on LAB work. |
| ii. | When the LAB work is complete the practitioner will dismiss the patient and click the tracker board display to indicate the room is empty. (Patient’s Worksheet Button 5) |
| d. | Make another appointment for the patient while in the room. |
| i. | If there is a need for an immediate another appointment the physician will click the tracker board display to test pending button (Patient’s Worksheet Button 4) to indicate the patient is waiting in the room waiting for another appointment. |
| ii. | A clinic clerk will make the appointment for the patient to be seen immediately using the Chapter labeled Front Desk Existing Patient Appointment section of this manual. As soon as the appointment is made the clinic clerk will check the patient in and assign a room for the new appointment as explained in Workup in process of this section. |
| iii. | The practitioner will take the patient from the holding room; click the tracker board display (Patient’s Worksheet Button Number 4) to indicate room is empty. The patient will be taken to the new room where the new appointment has been made. The patient status in the new room will be Work Up in Progress. Follow the steps from that point. |