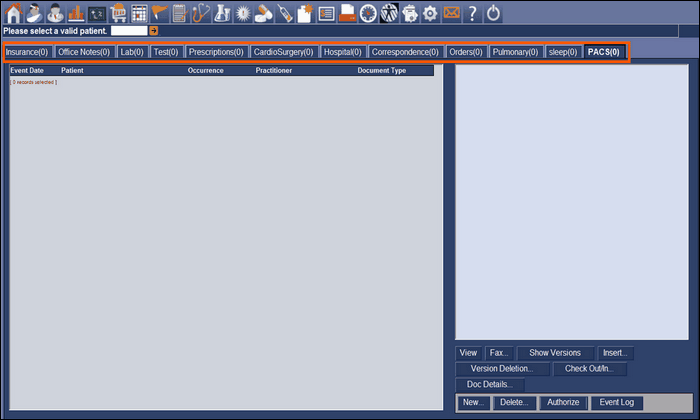
The chart folder tabs are used to collect documents that belong to a category like insurance, office notes, labs, etc. The number after the name of the tab is the total number of documents filed under the tab as shown below. Clicking on the tab will display the documents in the tab in descending date order. Summary information is displayed in the columns of for each document. The column headings are:
| 1. | Event Date |
| a. | This is the date of service |
| 2. | Patient Name |
| a. | The name of the patient |
| 3. | Occurrence |
| a. | Is a further description of the document |
| 4. | Practitioner |
| a. | The practitioner that performed the service |
| 5. | Document Type |
| a. | The type of document such as insurance card, operation note, discharge note, etc. |
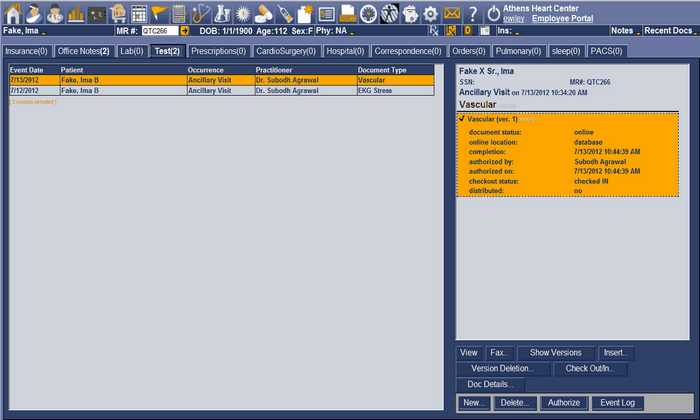
When selecting a document in the chart folder tab, additional information and status of the document will appear in the information panel to the right of the chart folder tabs as shown below.

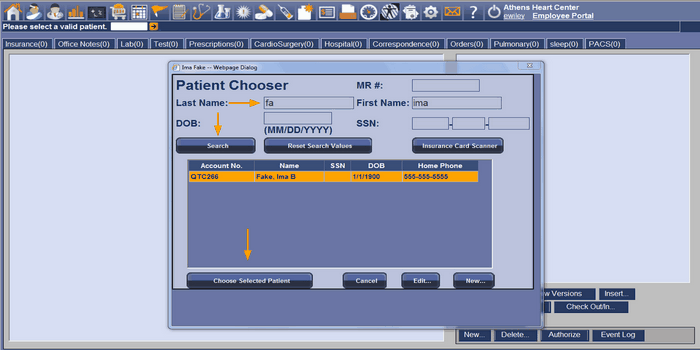
To use the chart, a patient must be selected. There are two methods for choosing a patient.
1. Enter the patient's MR# into the white rectangle located below the ribbon and click the yellow arrow square to select the patient.
2. Click the patient chooser button to show the patient chooser screen to search for a patient. Search for the patient using one of the search criteria and click the search button. Highlight the patient you want by clicking on the patient and click [Choose Selected Patient] to select the patient.

Once clicked, the chart screen will have a patient selected. The patient's name, MR#, and other information will be displayed under the ribbon. Each chart tab will have the number of items, if any, contained in the tab. Notice the patient in the below screen, she has two items under the [Test] and two under [Office Notes]. To view these items click on the corresponding tab. Also, notice on the right side of the screen the information panel. This panel contains information about the highlighted item in the list. In addition, the information panel contains buttons on the bottom for viewing, faxing, and others tools to work with the lists content.
