The Exception ICON Button is used to block or reserve a time slot on the appointment schedule so appointments are not made in the time slot. The Block command is used to block a time slot for one of kind circumstance such as when a physician will be out of the office for a specific date and time. The Reserve command is used to reserve a time slot for a specific appointment type like a 15 minute appointment or a 30 minute appointment for a specific date and time. To block or reserve large blocks of time or repetitive periods, such as lunch every day, it is easier to use “Add/Edit Schedules” section of the “Admin” area.
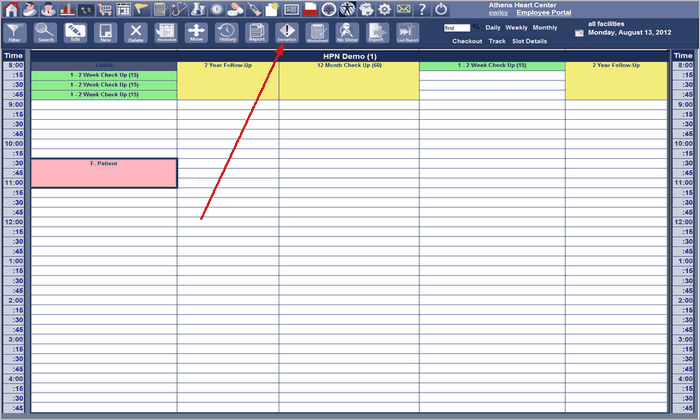
To block or reserve a time slot as unavailable, select the time slot and click on the Exception Icon Button as shown in Appointment Scheduling Front Desk Figure 51.

The Exception Processing Dialog screen is displayed.

| 1. | To block a time slot so no appointment can be made in that time slot select the Radio Button in the “BLOCK” area. The “BLOCK” area will expand. |
| 2. | Identify the reason and enter the start and end times. The reason can come from the drop down list or be entered then click the Submit Button as shown in Block Dialog Front Desk Figure 53. |

| 3. | To reserve the time slot for a specific type of appointment, click the Radio Button in the RESERVED area as shown in Exception Processing Dialog Front Desk Figure 52. The “RESERVED” area will expand. |
| 4. | Identify the reason and enter the start times. The reason can come from the drop down list or be entered then click the Submit Button as shown in Reserve Dialog Front Desk Figure 54. |

| 5. | To UN-Reserve the time slot for a specific type of appointment, click the Radio Button in the UN-RESERVED area as shown in Exception Processing Dialog Front Desk Figure 52. The “UN-RESERVE” area will expand. Click the Submit Button as shown in UN-Reserve Dialog Front Desk Figure 55. |
