Now that we have the template information and we know how to get to the template outline screen, let's fill in the outline information and begin building the template.
For this documentation, name the template Documentation Template.
The following is a brief definition of all the information that is used in the building of a template outline.
Template Name
This is how the template will read in either the Exam or Lab Flow section. The Exam Flow list will contain all of the visits created with templates for an office visit, consultation, follow up, etc. The Lab Flow list will contain all visits created with templates for tests. These tests may include echo, ultrasound, PETscan, etc. This will be discussed later, but for now, know how the template name is used.
Template Identifier
This an important piece of the template building process. The identifier is how the HPN Chart database keeps up with the template. When assigning a template to a patient during the creation of a visit, this name is used to find the template in the create a visit dialogue box. There are some rules as to the template identifier naming process.
Rule #1 |
The first letter of the identifier MUST be lowercase.
|
Rule #2 |
If there are multiple names in the identifier, do not use a space between them.
|
Rule #3 |
If there are multiple names in the identifier, all of the new words must begin with a capital letter. |
Notice in the screenshot below the template identifier is documentationTemplate. This name is good because it follows all three rules.
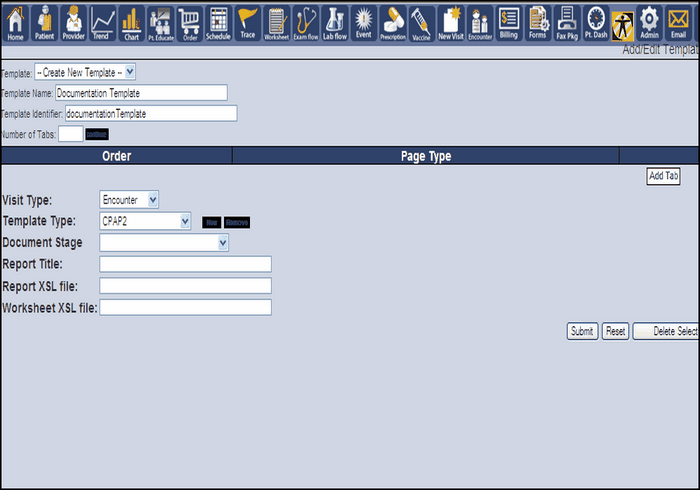
Number of Tabs
Careful planning of the tabs is important. These tabs will show in the Annotation View, and will show their assigned or custom content when clicked, once the template is in operation. There are two types of tabs, user defined and standard.
Visit Type
There are three visit types in the template process, we are only concerned with two. These two visit types are Encounter and Ancillary Visit.
Encounters |
These templates show in the Exam List and include visits when the patient will see the practitioner.
|
Ancillary Visits |
These templates show in the Lab Room and include patient test results. |
Template Type
Once the visit type is selected, we need to assign a template type. This is not a necessary step, however it helps to better organize the selection process when creating a visit.
Document Stage
The document stage of a template helps the database to decide how the final word document is formatted.
Report XSL File
This is the magic behind the template. The XSL file allows for the template to be fully editable in the Annotation View. The file also controls how the Annotation View appears to the user and controls the formatting of the final document. This is the final piece to the template. However, for this manual leave this part blank.
Worksheet XSL File
This controls the worksheet formatting, however, for this manual leave it blank.

Fill in all of the sections exactly how they are filled above. Click submit and we will be on our way to modifying this template.