The New ICON Button provides the capability to make a new appointment for an existing patient and for a new patient. (Caution should be used when adding a new patient if another software system creates MR Numbers. It is important to follow the site instructions for the correct use of this system and other software systems so the data of the two systems stay synchronized).
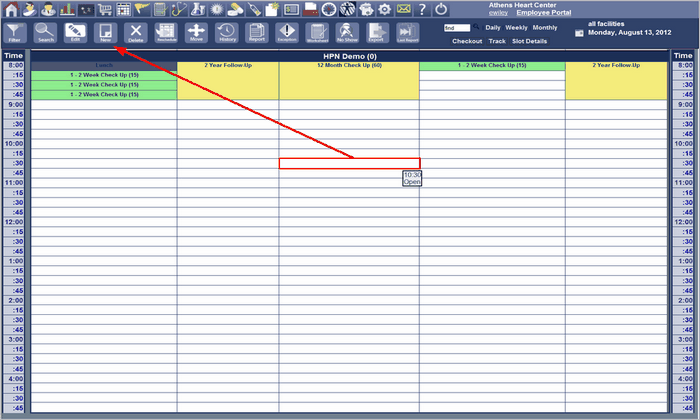
The New ICON Button is located as shown in Appointment Scheduling Front Desk Figure 34. Select an appointment slot and Click the New ICON Button. The Make an Appointment Screen Figure 35 will be displayed.
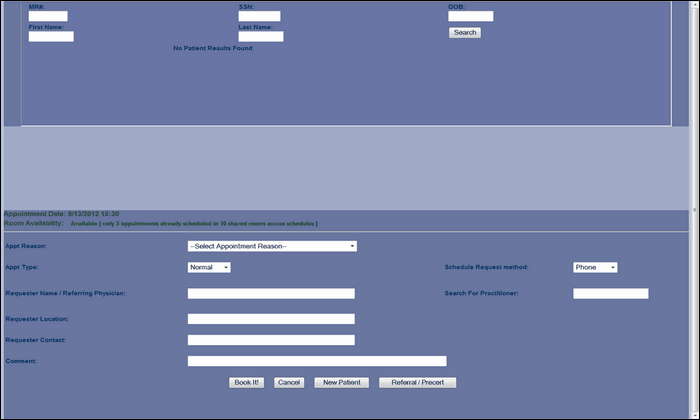
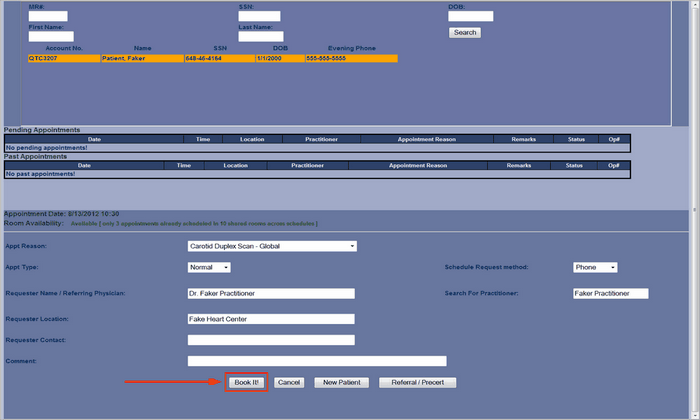
If the new appointment is for an existing patient, enter data in at least one of the search fields at the top of the page. Then Click on the Search Button. The Make an Appointment Screen should display additional information about the patient’s current appointments as well as the patient’s previous appointments. This is shown in Make an Appointment Front Desk Figure 35. A review of this data will aide in making the appointment.
If another date is required than the one selected, you must cancel this session by clicking the Cancel Button and select another appointment slot. Then continue with the appointment.
To continue with the appointment complete the appointment information.
If this appointment is a referral or a precert click on the Referral / Precert Button and complete the form.
Then click the Book It! Button to make the appointment.
If the patient does not exist or is a new patient, then the patient demographics must be added to the system. Do this by clicking the New Patient Button. Then Enter Patient Details Screen Front Desk Figure 36 will appear as displayed. Enter data for all TABS located at top of screen. Click the Submit Button when complete and the Patient Chooser Screen Front Desk Figure 37 will appear.
Click on Choose Selected Patient Button, this will display the Make Appointment Screen Front Desk Figure 38.
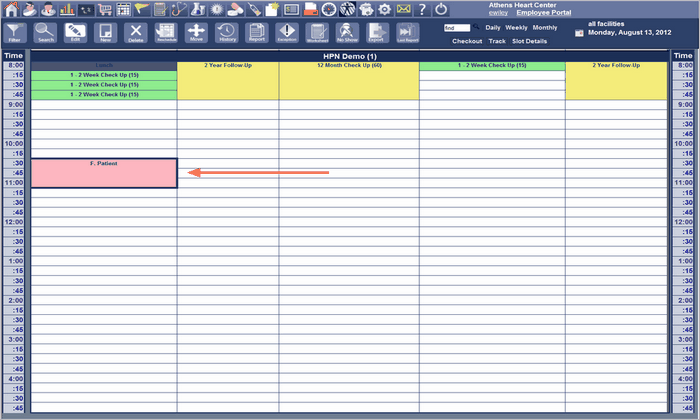
Complete the data to make the appointment if necessary and click the Book It! Button. The appointment will be made.