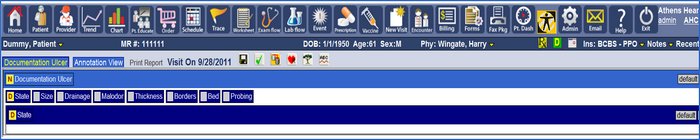
Terminal nodes are the last level in the template tree and they capture the information in HPN Chart. Since we have added the major categories of the template (State, Size,.....), its time to build the terminal nodes for each category. Since "State" is a straight forward example of adding the terminal nodes, let's work with it.
On our ulcer template outline we see that State has five check boxes:

For the development of this manual we assume that the research has been done for the template layout. State has five check boxes, but they need to broken into two sections. The first section is infected or non-infected. Assume this is the status of the ulcer. The second section is declining, improving, or stable. Call this the condition of the ulcer.
Note: We could flip the names of these sections and it would not make a difference. HPN Chart's template building method permits custom names of any node, so if the practitioner requesting this template wanted to name these two terminal nodes infection, condition, grade, degree, or anything else, we can handle it.
That being said, we will create these two terminal nodes. Click on State in the template structure screen, this will cause State to drop down to the next level:
Highlight State on the lower level by clicking beside it. Click the show/hide tree button. This will bring up the menu, from here select Add sub-clause. Now we will enter this information into the Add sub-clause dialogue box.
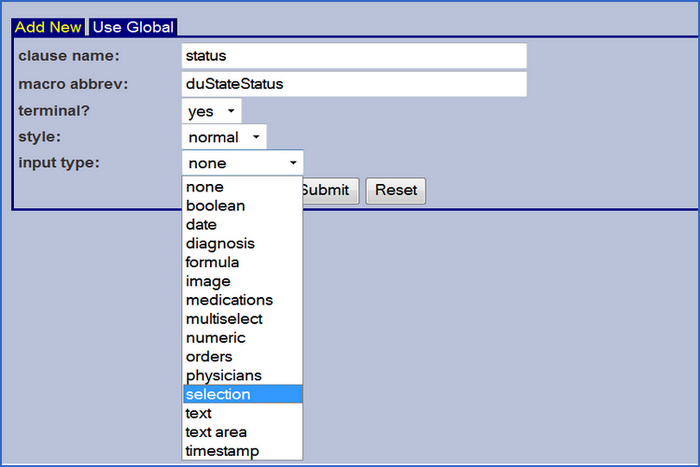
Name this terminal node "status" and make the macro abbrev name "duStateStatus" this will continue the macro abbrev name path from the first node to the terminal node....the last node.
In the terminal? box click the drop down arrow and select yes. This action will activate input type. The input type is the type of information that the terminal node will capture. For this terminal node click the drop down box arrow and choose selection. This input type allows the user to select one option from a list of options. We will discuss this option list later in the manual, but for now choose selection.
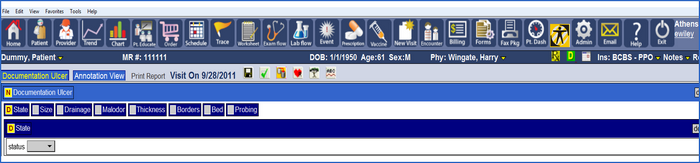
Now that all the information is entered, click Submit and refresh the page. Now the template structure screen should look like this.
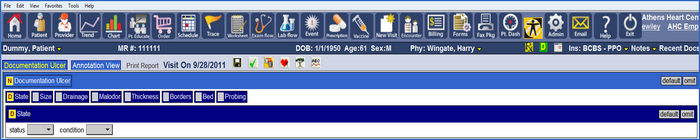
Now add the other terminal node "condition" following the same method as "status". Here is a view of the add sub clause dialogue box with the all of the information for "condition" followed by what the template structure will look like after submitting and refreshing the page.
The final step for the "State" node is to write the sentences that will populate on the Annotation View and will contain the chosen options provided from the terminal nodes "status" and "condition".