The Calendar ICON allows the user to reposition the appointment schedule to a different appointment day. The location of the Calendar ICON is at the top right of the screen. See Appointment Scheduling Front Desk Figure 84 for the location.
To activate the Calendar ICON, roll the cursor over the ICON. The calendar will appear. Roll the cursor off the calendar and the calendar will be dismissed. As long as the cursor remains in the calendar borders, the calendar will remain active. To cause the calendar to remain active even if roll the cursor outside of its borders, click the stick pin in the left hand corner of the calendar. The calendar will remain active until you click the stick pin again. See Appointment Scheduling Front Desk Figure 85.
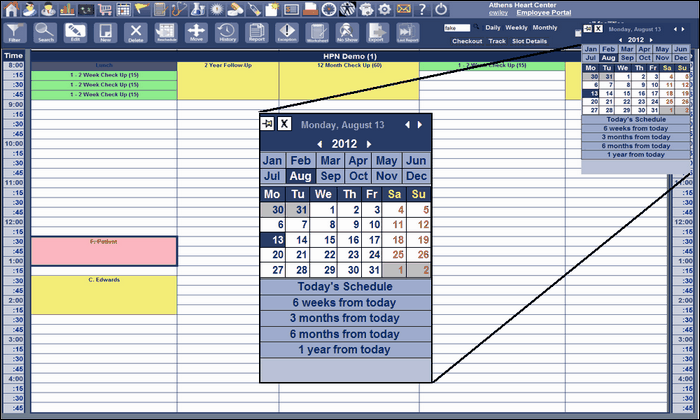
The calendar is made up of three parts. One is the Year Selector Arrows. In Appointment Calendar Control Figure 86, the year is displayed as 2007. On each side of the year are two arrow buttons. Clicking on the right arrow, the year will change to 2008. Click again and the arrow will change to 2009 and so on. Click on the left arrow and the prior year will appear.
The bottom block of buttons in the Front Page Figure 86 is starting with Today’s Schedule and ending with “1 year from today” helps making follow-up appointments. Follow-up appointments are made according to some fixed time schedule. Usually appointments are scheduled sometime in the future based on the current date. And for a fixed time period from the current date, like say six weeks from today. Clicking the “6 weeks from today” Button will
automatically advance the calendar date to a time six weeks from the current date. The appointment schedule will also move to that time period.
.