|
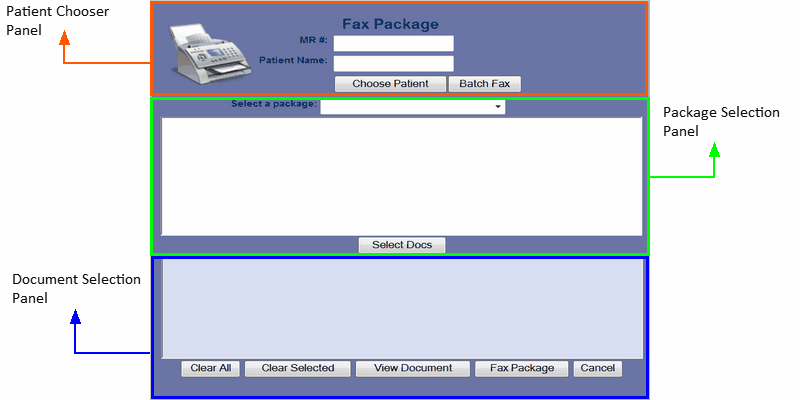
The FAX Manager provides the capability select and fax documents from the Repository for a patient or patient(s). To send documents click the FAX PKG ICON from the Main ICON Menu. This will produce the Fax Package Dialog as displayed in FAX MANAGER Figure 1.
FAX MANAGER Figure 1
The Fax Package Dialog Screen will provide a method to gather documents in a “fax package” for a patient or a group of patients. After the gathering and selection process, the package of documents can be Faxed. There are three panels in the Fax Package Dialog Screen. The Panels are Patient Chooser as outlined in red, Package Selection as outlined in green, and Document Selection as outlined in blue.
Patient Chooser Panel
The Patient Chooser Panel selects the patient or patient(s). This panel has two ways to select the patient or a group of patient. The two methods are performed by clicking one of the two Command Buttons in the panel. Clicking Patient Chooser Command Button will provide the capability to select a single patient. Clicking on the Batch Fax Command Button will select all patients with the same appointment date.
To select a single patient perform the following steps:
1. Click the Choose Patient Command Button
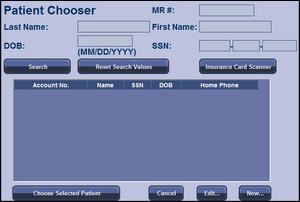
| 2. | The Patient Chooser Dialog Screen will appear. |
| 4. | The Patient Chooser Dialog will be dismissed and the MR# and Patient’s Name will appear in the fields on the Fax Package Screen. |
To select a group of patients for the same appointment date perform the following steps.
| 1. | Select the Batch Fax Command Button. |
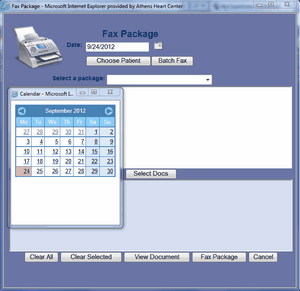
| 2. | Enter an appointment date in the Date Field. The date can be selected from a calendar displayed by clicking the Calendar ICON Button next to the date field. |
Package Selection Panel
The Package Selection Panel is used to select a group of document types predefined in a package or a package can be defined for one time use only. The Package Selection Panel outlined in green has two parts. The first part is the package select process. The second part displays the document types.
To select a predefined package follow these steps.
| 1. | The package selection process consists of one field labeled Select a Package. |
| 2, | The field contains a down arrow. Clicking on the down arrow will display the list of predefined packages. |
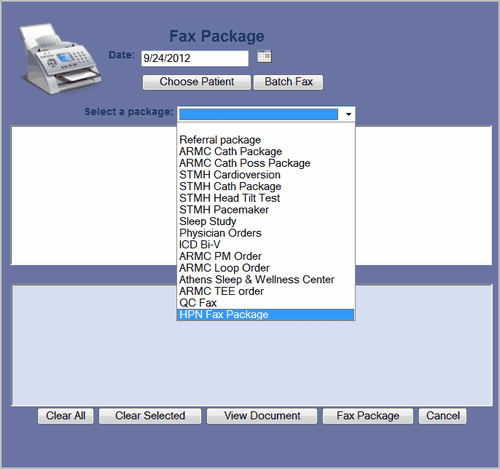
| 3. | A list of document types will be displayed in the display panel as shown below. |
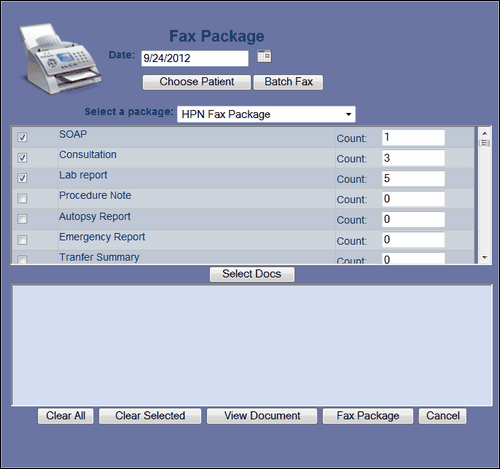
| 4. | The display panel has three columns. |
| a. | First column has check boxes. The boxes checked indicate the document type is part of the predefined package. The document types belonging to the package are listed first. |
| b. | The second column is the document type name. |
| c. | The third column is has a field labeled Count. The count indicates the latest document available for that type. |
| d. | The count can be changed: increased or decreased. Changing the count to a higher number indicates that all documents available be selected up to the count value. The selection will be the latest date to the earliest date. |
| d. | The selection of the document types within this package may be modified by clicking the check box of any document type not checked or clicking on the checked box to uncheck the box. This modification will not change the master package definitions. This is a onetime change. |
| e. | Click the Select Docs Command Button. The documents matching the patient and package criteria will be displayed in the Document Selection Panel. |
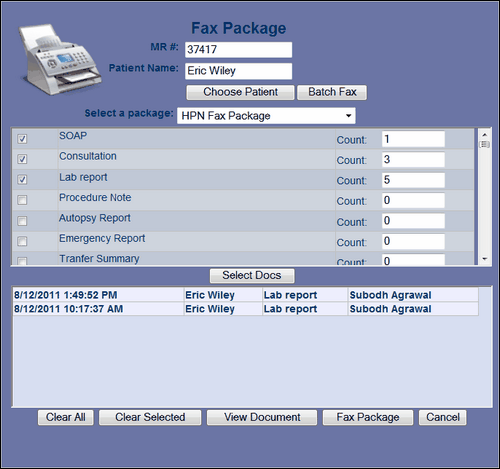
Document Selection Panel
The Document Selection Panel provides the capability to select the specific documents to be part the Fax package. When the documents matching the patient and document type selection are displayed, documents may be removed before they are faxed. This section is a “bucket” to store all documents to be faxed; therefore the selection process can be executed as many times necessary to build the “bucket”. A different specific patient or appointment date can be selected. A different document type package or a different modified package can be selected. Each time the selection process is executed, bucket fills. Finally, the specific documents that need to be discarded can be removed from the bucket before the faxing takes place.

To manage the documents in Document Selection Panel use the following steps.
| 1. | The Document Selection Panel has four columns. The first column is the time and date the document was created. The second column is the patient’s name. (The patient name is displayed because more than one patient may be in this “bucket” due to Batch Fax and multiple selection process of building the “bucket”.) The third column is the document type. The fourth document is the name of the practitioner authorizing the document. |
| 2. | They are five command buttons. |
| a. | Clear All Command Button – This button will completely clear the documents from the panel. |
| b. | Clear Selected – This button will clear only the selected documents from the panel. To use this button, at least one document must be selected. Click on the document to select it. Click on a selected document to deselect it. |
| c. | View Document – Select the document to be viewed and click the View Command Button. |
| d. | Fax Package – Clicking on this button will start the Fax Process for the documents in the Document Selection Panel. |
| e. | Cancel - This Button will dismiss the screen without any further actions. |
|