Make the Appointment in HPN Chart
| 1. | Access by clicking the Appointment Icon. |
| 2. | Note a yellow message appears under the schedule name. This message can be added by using the New Day Long Comment module and is used to alert the Front Desk that there is a slight change to the schedule or a Physician, normally on the schedule, is off for this day. |
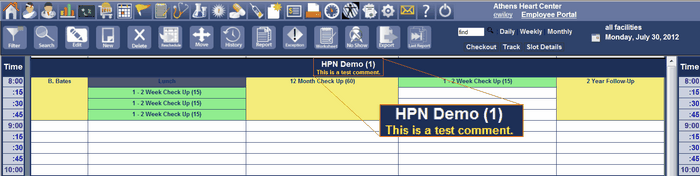
| 3. | A single click on the schedule name will display a summary and the status of the schedule. This is shown below. The screen includes three tabs: Schedule Tracking, New Day Long Comment, and Schedule Waiting List. The schedule tracking screen will list all appointments for the schedule in time order. It will give a status of each appointment. Then at the bottom of the list of appointments, it will display the status summary. |
![]()
| 4. |
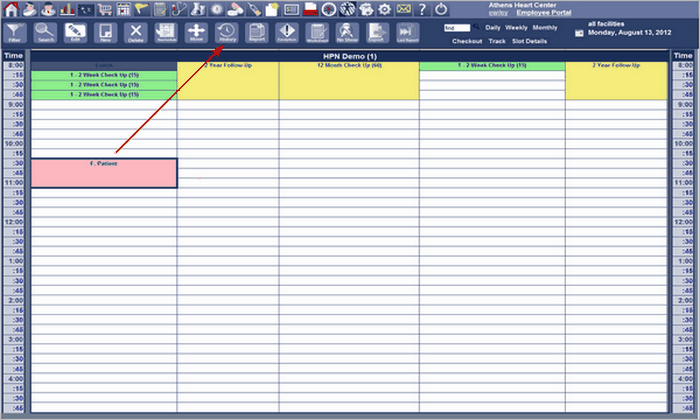
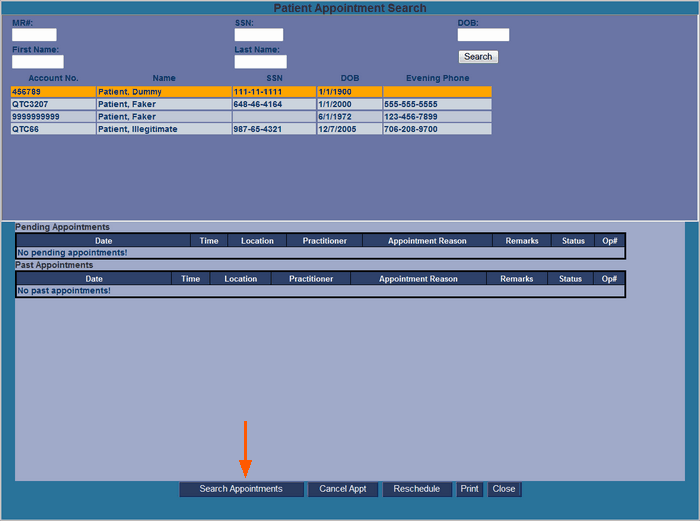
| 5. | To make an appointment click on the History button as shown below. The Patient Appointment Search Screen will appear. The appointment is made by completing this screen. See Front Desk Figure 6 Patient Appointment Search Screen. Enter the patient’s last name and click Search Button. |
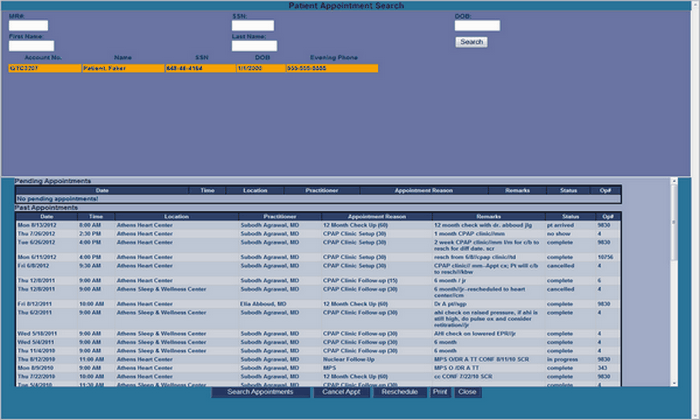
| 6. | The results of the search will appear in the lower half of the screen . This screen confirms no appointments are scheduled for this patient. Click on the Search Appointment Button on bottom of Appointment Search Screen. |
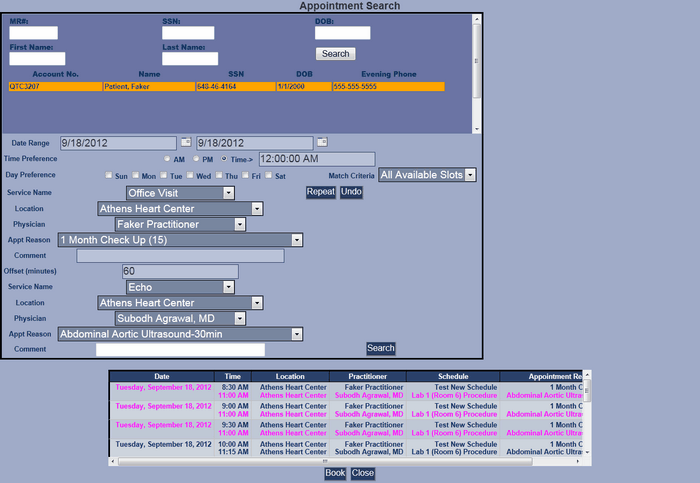
| 7. | Complete the date range, day and time preference, and match criteria. It is suggested to select “All Available Slots”. Select Service Name from drop down box. Select location for service from the drop down box. Your location is automatically shown. Select Physician from drop down box. Select the Appt Reason. Add any comment about the appointment. Click the Search Button. |
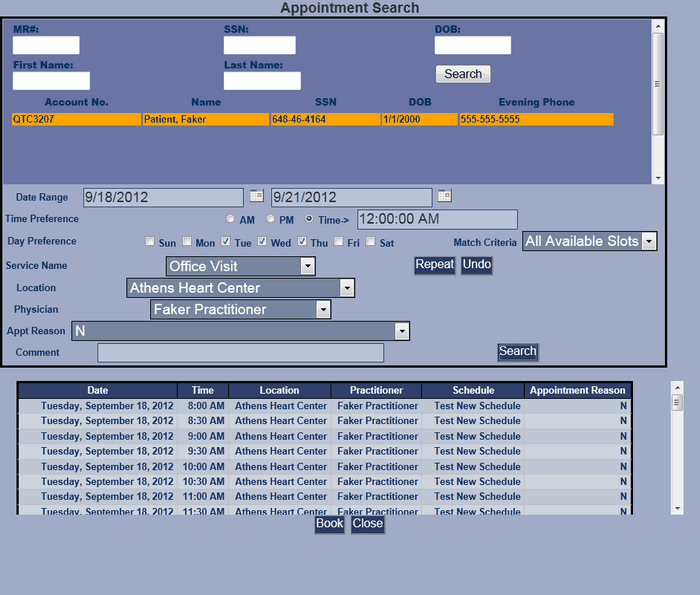
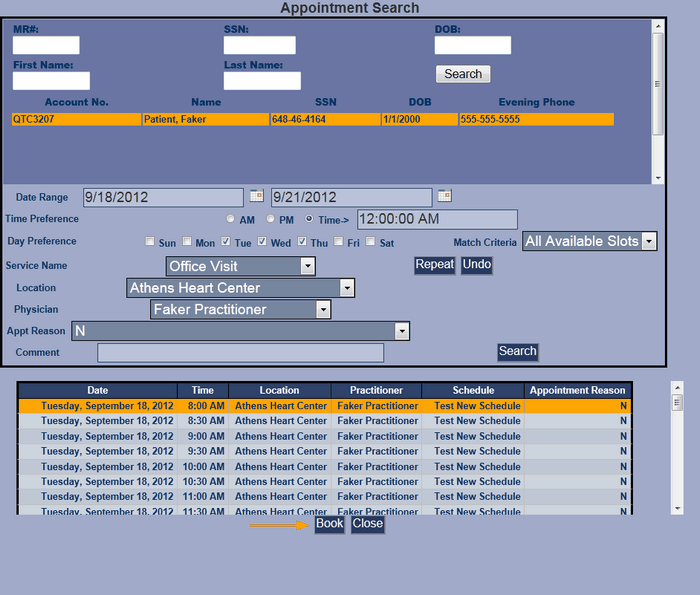
| 8. | The Appointment Search Screen Front Desk Figure 9 will now contain a scroll down box at the bottom of the screen that contains a list of open appointment slots matching the search criteria. Select the open appointment from the list and click the Book Button as shown in Appoint Search Front Desk Figure 10. You can change the search criteria for date and time day range and click search again until you find the appointment needed. |
| 9. | You can also make an additional appointment for the same day when the patient needs to see another physician or have a test performed. This is done by clicking the Repeat Button. The appointment scroll box will change and two appointments will be shown. Select the appropriate appointment line as required and click the Book Button. |